It's actually not nearly as daunting as you'd think, reupholstering an old bentwood rocker.
I found a rocker on my local Facebook Marketplace for 40.00. These things are HOT right now, and I wanted to have one for myself to use in our guest bedroom. So, why not?
Initially I had four fabric choices laid out for this chair - one of which was a vintage Witney four point blanket that I had previously used to upholster another chair.

I am completely hooked on HBC point blankets as I own one for my bed, and a vintage one I found while out thrifting. My mother in law had a Witney point blanket that she donated to my old upholstery project (see below).

It was actually Chris, my fiancee, that helped me choose the fabric to use for this bentwood rocker. He liked the retro feel of the peacock feather print, so that's what I chose! Of course, I thrifted it and it was $4.99, so I was even more thrilled with that!

To get down to business, you have to do some ugly stuff. That means taking the panels off of the seat and back of the chair (on these types of chairs, they're only held in with tiny finishing nails, so just pop them out!) I didn't want to simply cover over the existing fabric as it would create a mess of layers of grossness and staples on top of staples. So, I removed the original fabric with a strange little tool that Chris found in his stash for me.

Once I had all of the staples removed, I took the fabric and laid it flat in order to use it as a template to cut my new pieces from. This actually worked quite well, and I was careful to ensure my pattern was symmetrical prior to beginning my cuts.

The foam under the old fabric was still in good shape, so I was able to reuse it without much of a hassle. The real MVP in this whole scenario? Spray adhesive.

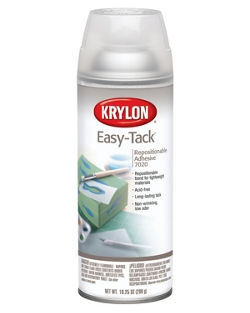
I sprayed the foam cushion with this Krylon Easy-Tack and began to gently lay my fabric against the foam. The spray adhesive is awesome, because it helps you smooth your fabric to a nice tight fit that ensures no gaps or puckers will happen when you begin to staple your fabric to the back of the wood. If you need to reposition it, you simply slowly peel it back and reapply! Look how nice the fit is and how well it lets the fabric grip the foam.

Once the fabric is nice and smooth and laid perfectly, flip your project over and staple the edges of the fabric to the wood base! Easy peasy!

The tricky part about doing the back of the seat, is that you need to roll your seams over in order to cover the staples. I actually used hot glue this time instead of sewing the back on as I've done in the past. I did this, because the back of the cushion tucks neatly into a frame in the back of the chair, and the seam doesn't actually even show - super handy! (There is a small fabric pucker in the following picture, but this was prior to finishing gluing, and before I permanently installed the back cushion.)

Get your finishing nails out, and tack your cushions back into the chair the same way they were when you started, and voila! SUPER KILLER VINTAGE BENTWOOD ROCKER WITH NEW LIFE

Comments